
This article first appeared in 2016 when I wrote for Womenclimb website. As it’s National Map Reading Week I’m sharing the content again here… with a bit of a refresh.
Here are my top tips for planning your own adventure and not getting flustered by navigation:
1.Remember the 5 P’s
Proper Planning Prevents Poor Performance! Look at the map before you head out and plan a route that’s easy to follow. Not all routes are on easy-to-navigate paths and may require you to pay attention to the paths and terrain you’re on. Planning in advance will save time and arguments and definitely prevent you getting lost!
Think about what the route is and what type of map you’re going to use.
If its a day walk you might want an 1:25,000 Ordnance Survey Explorer map. For a multi-day walk you might decide to use a 1:50,000 Ordnance Survey Landranger map to have more of the route on one map. If you’re in the mountains you might decide to use Harvey’s 1:40,000 Mountain maps which identify the contours more visually. Or if you’re after an afternoon adventure you might pick a local orienteering map!


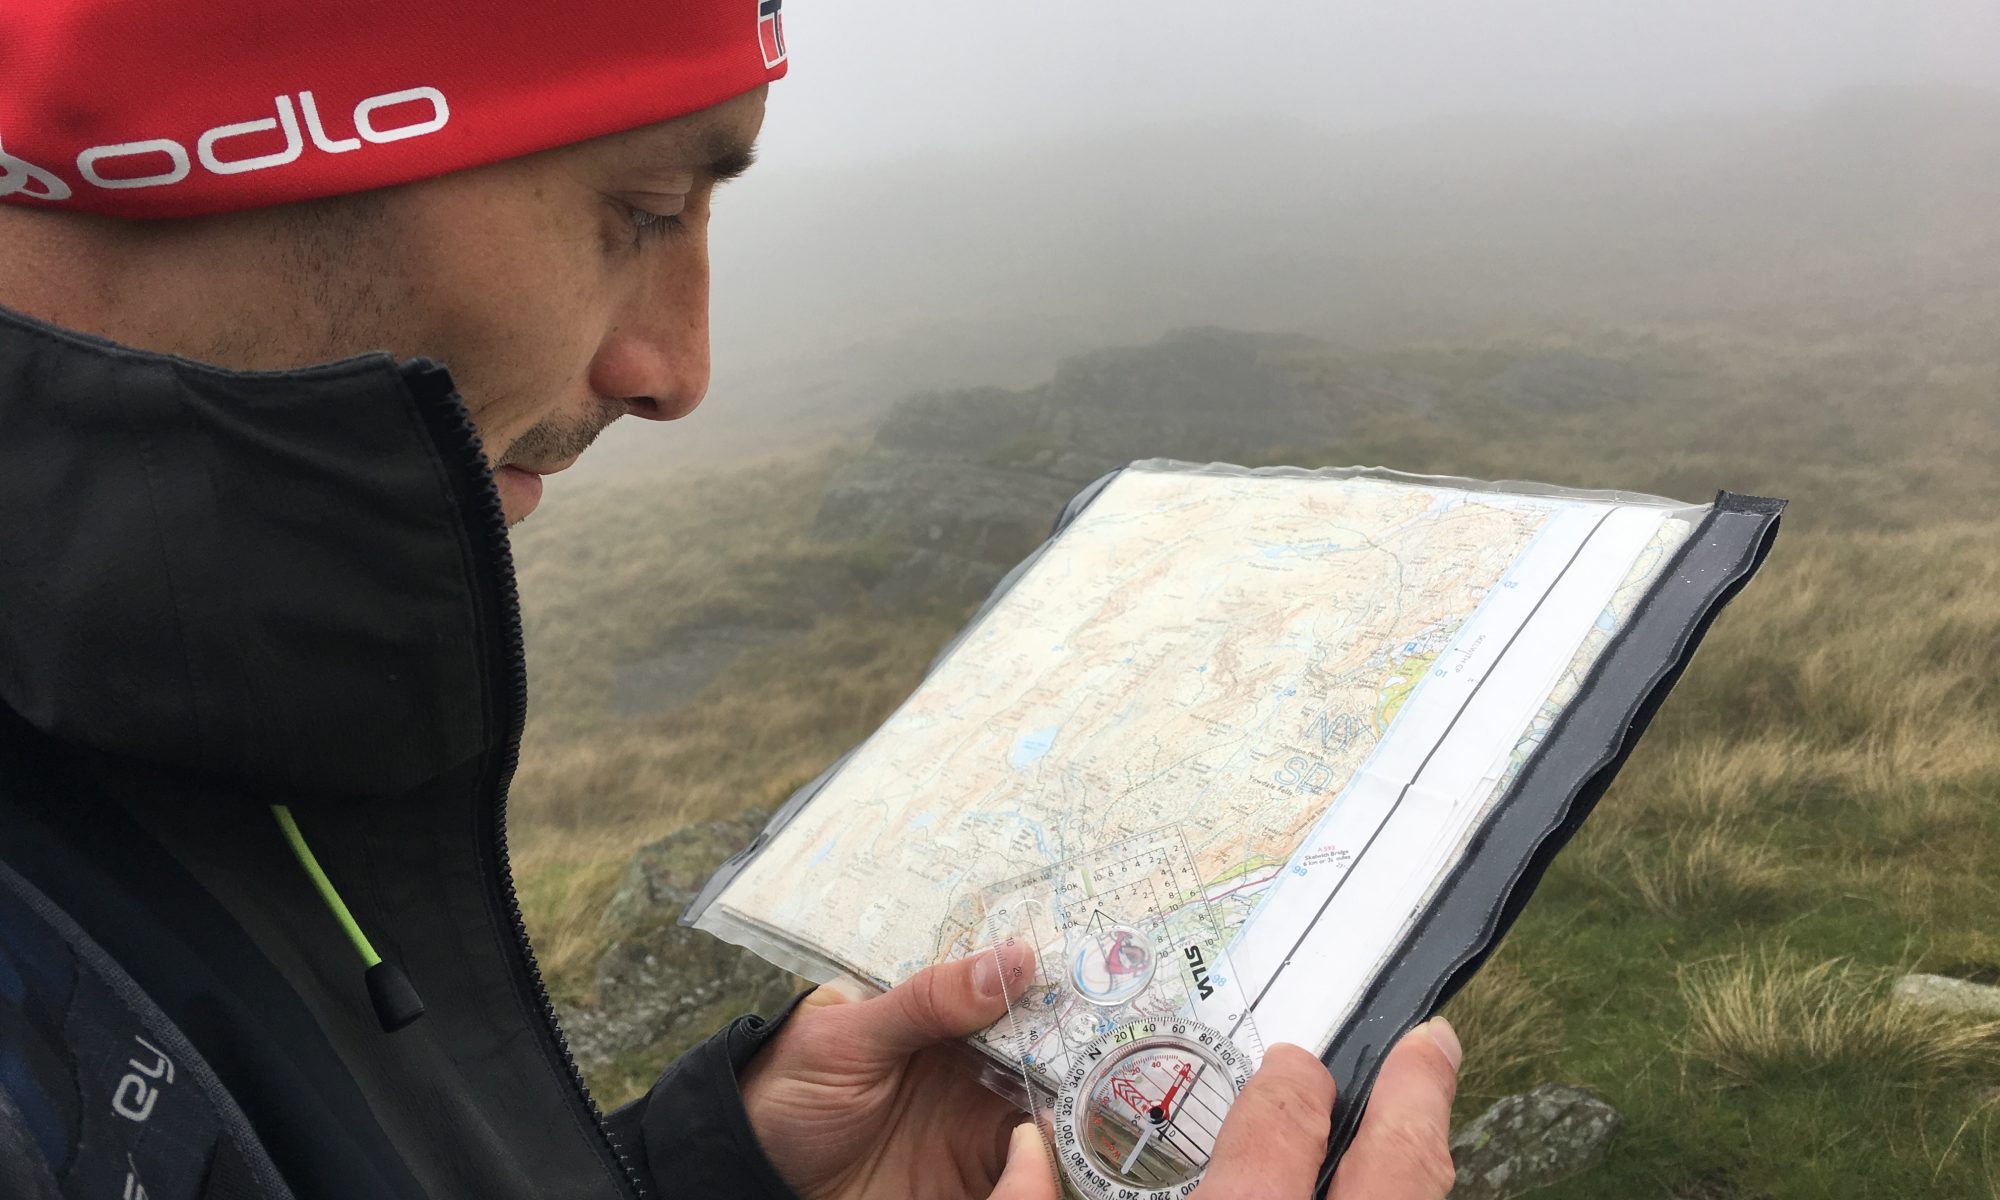
2. Understand the map symbols
- Do you know what all the symbols mean?
- Can you identify a footpath from a bridleway?
- Do you understand open access moorland?
If you’re not sure how to read a map, taking a course can really help. We have a range of navigation courses to suit all abilities, (see our events page) but there’s also lots of fantastic free resources on the Ordnance Survey page.
Understanding the details on the map can really help to reduce the stress of navigating.

3. Understand map features: Grid Lines & Grid References
The grid lines are the faint blue squares superimposed over a map which form the basis for identifying a location.
Each square measures 1km across the lines or 1.5km from corner to corner so they can be useful for quickly judging distances. They are however principally used to give a grid reference, which when given as a 6 figure can give an accuracy of 100m of a location.
To understand how to identify a grid reference have a look at this helpful link.
4. Understanding map features: Contour Lines
Contour lines are the faint orange/brown lines that are used to identify the shape and altitude of the landscape.
While it’s easier to pick out the massive mountains using them, it’s worth studying the map to learn to identify the smaller contour features which can help to aid your navigation.
Contours have the height marked on them at certain points, which gives away whether the route is up or downhill. It might not matter too much for a few km walk from a car park, but if you’re carrying kit a long way to somewhere a bit more remote then it will make all the difference to how quickly you get there, and how knackered you are!
You need to roughly add 1 minute for every contour line you cross heading uphill, but it might be more if you’re not on a path and you are crossing scree, rocky terrain or moorland or if you’re carrying a heavy rucksack.

5. Orientate the map!
If you’re going to use a map it’s essential to orientate it in the direction of travel as you walk. Get your map and turn it round until what you see in front of you is represented on the map, in the right direction. Keep your thumb on the map as you travel to be able to quickly identify where you are.
It can sometimes take a bit of practice, but it’s the easiest way to be able to quickly navigate and understand how what you see in the map relates to your surroundings. Its also the easiest way to prevent getting lost!
6. The 5 D’s
- Distance – How far are you going to travel?
- Direction – Which direction are you heading?
- Description – what are the features you’re going to pass and tick off as you go?
- Duration – How long will it take you?
- Dangers – are there any hazards en route?
As you’re walking, make sure you pay attention to what features you should pass on the route – check them as you pass over or by them. You can mark your map to keep track of where you are.
7. Understanding how to use a compass.
Using a compass if something that many of us learnt at school or scouts and haven’t used since. For many walks its not essential to use a compass as we’re following footpaths or features like rivers and walls. However, when walking across open moorland, or in the high mountains compass skills can be essential.
For an overview of how to use a compass for navigating check out this introduction post from the Ordnance Survey and this more detailed one.
8. Have an escape route
- What do you do when you the wether changes and you need to change your plan?
- Can you safely navigate your way back without getting stuck?
- Are you confident navigating in poor weather or when it gets dark?
Having an escape route or even a few options to cut short your plans is useful to have planned in advance to make a quick exit. Weather can be extremely changeable even when you have done your best to plan.
Read my blog over at Ordnance Survey about why using OSLocate app is a good safety tool.
